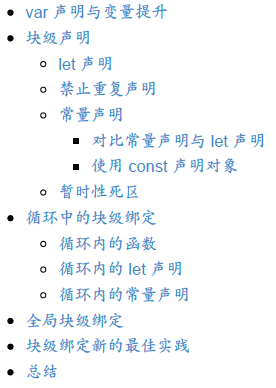
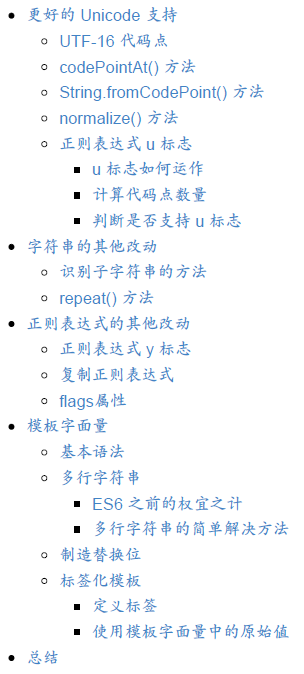
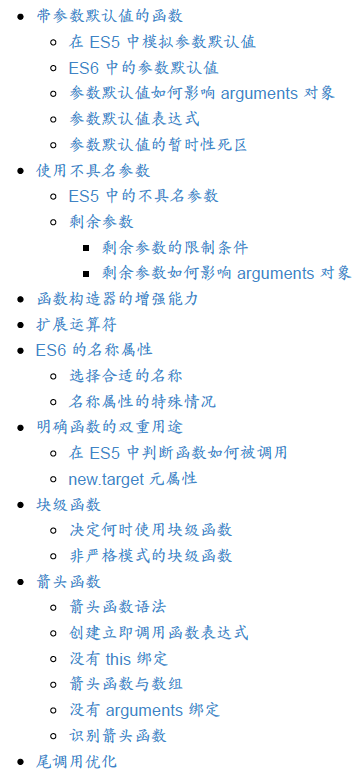
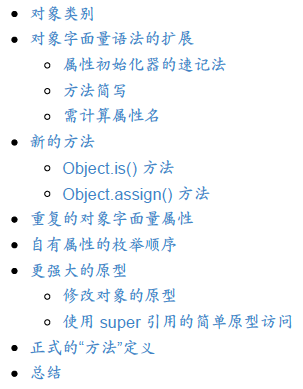
let const 没什么新的东西 就不写了
不知道为什么这本书后面都用的 var
字符串与正则表达式 更好的 Unicode 支持 Unicode使用16位二进制来存储文字。我们将一个16位的二进制编码叫做一个码元(Code Unit),Unicode编码范围在0 - 2^16。也就是我们所说的占一个字节。
由于技术的发展,Unicode对文字编码进行了扩展,将某些文字扩展到了32位(占用两个码元),并且,将某个文字对应的二进制数字叫做码点(Code Point),Unicode编码范围在0 - 2^32,占2个字节。
特别要注意,码点可以是一个码元,也可以是两个码元。
字符串的length属性返回的是码元。所以在对一些字符串如果要处理长度的时候要注意这一点。
ES6 为了支持 Unicode 的发展也新增了一些方法
codePointAt() 可以在给定字符串中按位置提取 Unicode 代码点。该方法接受的是码元位置 而非字符位置,并返回一个整数值。
charCodeAt 的优化版
charCodeAt是根据码元来匹配,codePointAt是根据码点来进行匹配的。
1
2
3
4
5
6
7
var text = "𘚠a" ; console .log (text.charCodeAt (0 )); console .log (text.charCodeAt (1 )); console .log (text.charCodeAt (2 )); console .log (text.codePointAt (0 )); console .log (text.codePointAt (1 )); console .log (text.codePointAt (2 ));
判断字符包含了一个还是两个码元
1 2 3 4 function is32Bit (c ) {return c.codePointAt (0 ) > 0xFFFF
String.fromCodePoint
codePointAt() 的逆操作
1 console .log (String .fromCodePoint (134071 ))
codePointAt <—> fromCodePoint
charCodeAt <—> fromCharCode
normalize 开发国际化应用时,这个方法很重要
在比较字符串时,必须被标准化为同一种形式
正则表达式 u 标志 正则表达式假定单个字符由一个16位的码元表示。为了解决这个问题,ES6 定义了用于处理 Unicode 的 u 标志
当一个正则表达式设置了 u 标志后看,工作表模式将切换到针对字符,而不是针对码元
计算码点数量
1
2
3
4
function codePointLength (text ) {let result = text.match (/[\s\S]/gu )return result ? result.length : 0
判断是否支持 u 标志
1
2
3
4
5
6
7
8
function hasRegExpU (try {let pattern = new RegExp ("." , "u" )return true catch (ex) {return false
字符串的其他改动 识别子字符串的方法 includes() 方法,在给定文本存在于字符串中的任意位置时会返回 true ,否则返回false ;
startsWith() 方法,在给定文本出现在字符串起始处时返回 true ,否则返回 false ;
endsWith() 方法,在给定文本出现在字符串结尾处时返回 true ,否则返回 false 。
每个方法都接受两个参数:需要搜索的文本 ,以及可选的搜索起始位置索引 。
当提供了第二个参数时, includes() 与 startsWith() 方法会从该索引位置开始尝试匹配;而endsWith() 方法会将字符串长度减去该参数 ,以此为起点开始尝试匹配。
当第二个参数未提供时, includes() 与 startsWith() 方法会从字符串起始处开始查找,而 endsWith() 方法则从尾部开始。实际上,第二个参数减少了搜索字符串的次数。以下是使用这些方法的演示:
1
2
3
4
5
6
7
8
9
10
var msg = "Hello world!" ;console .log (msg.startsWith ("Hello" )); console .log (msg.endsWith ("!" )); console .log (msg.includes ("o" )); console .log (msg.startsWith ("o" )); console .log (msg.endsWith ("world!" )); console .log (msg.includes ("x" )); console .log (msg.startsWith ("o" , 4 )); console .log (msg.endsWith ("o" , 8 )); console .log (msg.includes ("o" , 8 ));
若你需要找到它们在另一个字符串中的确切位置,则需要使用 indexOf() 和 lastIndexOf() 。
如果向 startsWith() 、 endsWith() 或 includes() 方法传入了正则表达式,会抛出错误。
而 indexOf() 以及 lastIndexOf() 会将正则表达式转换为字符串并搜索它。
repeat ES6 还为字符串添加了一个 repeat() 方法,它接受一个参数作为字符串的重复次数,返回一个将初始字符串重复指定次数的新字符串。
1
2
3
console .log ("x" .repeat (3 )); console .log ("hello" .repeat (2 )); console .log ("abc" .repeat (4 ));
正则表达式的其他改动 y 标志 y 标志影响正则表达式搜索时的粘连( sticky )属性,它表示从正则表达式的 lastIndex 属性值的位置开始检索字符串中的匹配字符。如果在该位置没有匹配成功,那么正则表达式将停止检索
复制正则表达式 允许复制正则表达式时修改标志
1
2
3
4
5
6
7
8
9
10
11
12
var re1 = /ab/i ,new RegExp (re1, "g" ); console .log (re1.toString ()); console .log (re2.toString ()); console .log (re1.test ("ab" )); console .log (re2.test ("ab" )); console .log (re1.test ("AB" )); console .log (re2.test ("AB" ));
flags 属性 1 2 3 var re = /ab/g ;console .log (re.source ); console .log (re.flags );
模板字符串 模板字符串解决了什么问题:
多行字符串:针对多行字符串的形式概念;
基本的字符串格式化:将字符串部分替换为已存在的变量值的能力;
HTML 转义:能转换字符串以便将其安全插入到 HTML 中的能力。
多行字符串 1 2 3 4 5 6 let message = `Multiline string` ;console .log (message); console .log (message.length );
反引号之内的所有空白符都是字符串的一部分,因此需要留意缩进
如果让多行文本保持合适的缩进很重要,考虑将多行模板字面量的第一行空置并在此后进行缩进
1 2 3 4 let html = ` <div> <h1>Title</h1> </div>` .trim ();
制造替代位 ${任意表达式}
模板字面量本身也是 JS 表达式,因此可嵌套
标签化模板 一个模板标签( template tag )能对模板字面量进行转换并返回最终的字符串值
1 let message = tag`Hello world` ;
标签( tag )是函数,它被调用时接收需要处理的模板字面量数据。标签所接收的数据被划分为独立片段,并且必须将它们组合起来以创建结果。第一个参数是个数组,包含被 JS 解释过的字面量字符串,随后的参数是每个替换位的解释值。
1 2 3 function tag (literals, ...substitutions ) {
内置的标签 String.raw()
1
2
3
4
5
6
let message1 = `Multiline\nstring` ,String .raw `Multiline\nstring` ;console .log (message1);console .log (message2);
内部实现
1 2 3 4 5 6 7 8 9 10 11 12 13 14 function raw (literals, ...substitutions ) {let result = "" ;for (let i = 0 ; i < substitutions.length ; i++) {raw [i]; raw [literals.length - 1 ];return result;let message = raw`Multiline\nstring` ;console .log (message); console .log (message.length );
函数 参数默认值 参数默认值的存在触发了 arguments 对象与具名参数的分离
1 2 3 4 5 6 7 8 9 10 11 function mixArgs (first, second = "b" ) {console .log (arguments .length ); console .log (first === arguments [0 ]); console .log (second === arguments [1 ]); "c" ;"d" console .log (first === arguments [0 ]); console .log (second === arguments [1 ]); mixArgs ("a" );
参数默认值可以使用表达式
参数默认值存在暂时性死区
1 2 3 4 5 function add (first = second, second ) {return first + second;console .log (add (1 , 1 )); console .log (add (undefined , 1 ));
剩余参数 …具名参数
是包含传递给函数的其余参数的一个数组
函数的 length 属性用于指示剧名参数的数量,而剩余参数对其毫无影响
剩余参数的限制条件:
一、函数只能有一个剩余参数,并且它必须被放在最后。
二、剩余参数不能在对象字面量的 setter 属性中使用。(对象字面量的 setter 被限定只能使用单个参数)
1
2
3
4
5
6
let object = {set name (...value ) {
设计剩余参数是为了替代 ES 中的 arguments
1 2 3 4 5 6 7 function checkArgs (...args ) {console .log (args.length ); console .log (arguments .length ); console .log (args[0 ], arguments [0 ]); console .log (args[1 ], arguments [1 ]); checkArgs ("a" , "b" );
拓展运算符
拓展运算符常和剩余参数一起使用
以一个例子为例,查找数组最大值
1 2 3 4 5 6 7 let values = [25 , 50 , 75 , 100 ]console .log (Math .max .apply (Math , values)); let values = [25 , 50 , 75 , 100 ]console .log (Math .max (...values));
ES6 的名称属性 匿名函数使得调试困难,因此 ES6 给所有函数添加了 name 属性。name 仅用于在调试时获得函数的相关信息,不能获取对函数的引用
1 2 3 4 5 6 7 8 function doSomething (var doAnotherThing = function (console .log (doSomething.name ); console .log (doAnotherThing.name );
特殊情况
1 2 3 4 5 6 7 8 9 10 11 12 13 14 15 var doSomething = function doSomethingElse (var person = {get firstName () {return "Nicholas" sayName : function (console .log (this .name );console .log (doSomething.name ); console .log (person.sayName .name ); var descriptor = Object .getOwnPropertyDescriptor (person, "firstName" );console .log (descriptor.get .name );
getter 函数会有 get 前缀,setter 函数会有 set 前缀
getter 与 setter 函数都必须使用 Object.getOwnPropertyDescriptor 来检索
1 2 3 4 5 var doSomething = function (console .log (doSomething.bind ().name ); console .log ((new Function ()).name );
使用 bind() 创建的函数会有 bound 前缀
使用 Function 构造器创建的函数会有 anonymous 前缀
明确函数的双重用途 一般函数 和 构造函数(new),构造函数名首字母大写
JS 为函数提供了两个内部方法,[[Call]] 和 [[Construct]]
函数未使用 new 调用时,[[call]] 方法执行,运行函数体
函数使用 new 调用时,[[Construct]] 方法调用,创建一个新的对象,并且以该对象为 this 执行函数体
拥有 [[Constructor]] 方法的函数被称为构造器
判断调用的是什么方法
当 [[Constructor]] 被调用时,new.target 为 new 调用的构造函数
当 [[Call]] 被调用时,new.target 为 undefiend
1 2 3 4 5 6 7 8 9 10 function Person (name ) {if (typeof new .target !== "undefined" ) {console .log (new .target ) this .name = name; else {throw new Error ("You must use new with Person." )var person = new Person ("Nicholas" );var notAPerson = Person .call (person, "Michael" );
块级函数 块级函数会被提升到所在代码块的顶部
而使用 let 的函数表达式不会
箭头函数 没有 this 、 super 、 arguments ,也没有 new.target 绑定。this 、 super 、arguments 、以及函数内部的 new.target 的值由所在的、最靠近的非箭头函数来决定。
不能被使用 new 调用: 箭头函数没有 [[Construct]] 方法,因此不能被用为构造函数,使用 new 调用箭头函数会抛出错误。
没有原型: 既然不能对箭头函数使用 new ,那么它也不需要原型,也就是没有prototype 属性。
不能更改 this : this 的值在函数内部不能被修改,在函数的整个生命周期内其值会保持不变。
没有 arguments 对象: 既然箭头函数没有 arguments 绑定,你必须依赖于具名参数或剩余参数来访问函数的参数。
不允许重复的具名参数: 箭头函数不允许拥有重复的具名参数,无论是否在严格模式下;而相对来说,传统函数只有在严格模式下才禁止这种重复。
箭头函数也拥有 name 属性,并且遵循与其他函数相同的规则
尾调用优化 这是一项引擎优化,改变了尾部调用的系统。
尾调用(tail call )指的是调用函数的语句是另一个函数的最后语句
1 2 3 function doSomething (return doSomethingElse ();
在 ES5 引擎中实现的尾调用,其处理就像其他函数调用一样:一个新的栈帧 ( stack frame)被创建并推到调用栈之上,用于表示该次函数调用。这意味着之前每个栈帧都被保留在内存中,当调用栈太大时会出问题。
ES6 在严格模式下力图为特定尾调用减少调用栈的大小(非严格模式的尾调用则保持不变)。当满足以下条件时,尾调用优化会清除当前栈帧并再次利用它,而不是为尾调用创建新的栈帧 :
尾调用不能引用当前栈帧中的变量(意味着该函数不能是闭包);
进行尾调用的函数在尾调用返回结果后不能做额外操作;
尾调用的结果作为当前函数的返回值。
尾调用优化主要是用在递归中
不考虑尾调用
1 2 3 4 5 6 7 8 function factorial (n ) {if (n <= 1 ) {return 1 ;else {return n * factorial (n - 1 );
考虑尾调用
1 2 3 4 5 6 7 8 function factorial (n ) {if (n <= 1 ) {return 1 ;else {return n * factorial (n - 1 );
在重写的 factorial() 函数中,添加了第二个参数 p ,其默认值为 1 。 p 参数保存着前一次乘法的结果,因此下一次的结果就能在进行函数调用之前被算出。
尾调用优化是你在书写任意递归函数时都需要考虑的因素 ,因为它能提供显著的性能提升,尤其是被应用到计算复杂度很高的函数时。
对象 需计算属性名 方括号允许你将变量或字符串字面量指定为属性名
1 2 3 4 5 6 7 8 9 10 11 12 13 14 15 16 17 var lastName = "last name" ;var person = {"first name" : "Nicholas" ,"Zakas" console .log (person["first name" ]); console .log (person[lastName]); var suffix = " name" ;var person = {"first" + suffix]: "Nicholas" ,"last" + suffix]: "Zakas" console .log (person["first name" ]); console .log (person["last name" ]);
新方法 Object.is() Object.is() 用来判断两个值是否相等,修复了 === 的一些问题
1 2 3 4 5 6 7 console .log (+0 == -0 ); console .log (+0 === -0 ); console .log (Object .is (+0 , -0 )); console .log (NaN == NaN ); console .log (NaN === NaN ); console .log (Object .is (NaN , NaN ));
Object.assign() 用于混入对象
Object.assign() 方法接受任意数量的供应者,而接收者会按照供应者在参数中的顺序来依次接收它们的属性。这意味着在接收者中,第二个供应者的属性可能会覆盖第一个供应者的。
1 2 3 4 5 6 7 8 9 10 11 12 var receiver = {};Object .assign (receiver,type : "js" ,name : "file.js" type : "css" console .log (receiver.type ); console .log (receiver.name );
由于 Object.assign() 使用赋值运算符,供应者的访问器属性就会转变成接收者的数据属性
1 2 3 4 5 6 7 8 9 10 11 12 13 var receiver = {},get name () {return "file.js" Object .assign (receiver, supplier);var descriptor = Object .getOwnPropertyDescriptor (receiver, "name" );console .log (descriptor.value ); console .log (descriptor.get );
自有属性的枚举顺序 ES6 则严格定义了对象自有属性在被枚举时返回的顺序。
对 Object.getOwnPropertyNames() 与 Reflect.ownKeys 如何返回属性造成了影响,还同样影响了 Object.assign() 处理属性的顺序。
自有属性枚举时基本顺序如下:
所有的数字类型键,按升序排列。
所有的字符串类型键,按被添加到对象的顺序排列。
所有的符号类型(详见第六章)键,也按添加顺序排列。
1 2 3 4 5 6 7 8 9 10 11 12 var obj = {a : 1 ,0 : 1 ,c : 1 ,2 : 1 ,b : 1 ,1 : 1 d = 1 ;console .log (Object .getOwnPropertyNames (obj).join ("" ));
数值类型的键会被合并并排序;字符串类型的键会跟在数值类型的键之后
for-in 循环的枚举顺序仍未被明确规定,因为并非所有的 JS 引擎都采用相同的方式。而 Object.keys() 和 JSON.stringify() 也使用了与 for-in 一样的枚举顺序。
更强大的原型 修改对象的原型 直到 ES5 为止, JS 编程最重要的假定之一就是对象的原型在初始化完成后会保持不变。
ES6 通过添加 Object.setPrototypeOf() 方法而改变了这种假定,此方法允许你修改任意指定对象的原型。
它接受两个参数:需要被修改原型的对象,以及将会成为前者原型的对象。
super super 使得在对象原型上的功能调用变得更容易
super 是指向当前对象的原型的一个指针,实际上就是 Object.getPrototypeOf(this) 的值
正式的“方法”定义 在 ES6 之前,“方法”的概念从未被正式定义,它此前仅指对象的函数属性(而非数据属性)。
ES6 则正式做出了定义:方法是一个拥有 [[HomeObject]] 内部属性的函数 ,此内部属性指向该方法所属的对象。
任何对 super 的引用都会使用 [[HomeObject]] 属性来判断要做什么。第一步是在 [[HomeObject]] 上调用 Object.getPrototypeOf() 来获取对原型的引用;接下来,在该原型上查找同名函数;最后,创建 this 绑定并调用该方法。
解构 对象解构 当使用解构来配合 var 、 let 或 const 来声明变量时,必须提供初始化器 (即等号右边的值)。
1 2 3 4 5 6 7 8 var { type, name };let { type, name };const { type, name };
解构赋值表达式的值为表达式右侧(在 = 之后)的值。
也就是说在任何期望有个值的位置都可以使用解构赋值表达式。例如,传递值给函数:
1 2 3 4 5 6 7 8 9 10 11 12 13 14 15 let node = {type : "Identifier" ,name : "foo" "Literal" ,5 ;function outputInfo (value ) {console .log (value === node); outputInfo ({ type, name } = node);console .log (type); console .log (name);
可以给默认值,也可以给不同的变量名
1 2 3 4 5 6 7 8 let node = {type : "Identifier" let {type : localType, name : localName = "bar" } = nodeconsole .log (localType); console .log (localName);
嵌套解构
1 2 3 4 5 6 7 8 9 10 11 12 13 14 15 16 17 18 19 20 let node = {type : "Identifier" ,name : "foo" ,loc : {start : {line : 1 ,column : 1 end : {line : 1 ,column : 4 let { loc : { start : localStart }} = node;console .log (localStart.line ); console .log (localStart.column );
数组解构 与对象差别不大,也有默认值、嵌套解构等
可以用来交换两个值
剩余项
1 2 3 4 5 6 7 let colors = [ "red" , "green" , "blue" ];let [ firstColor, ...restColors ] = colors; console .log (firstColor); console .log (restColors.length ); console .log (restColors[0 ]); console .log (restColors[1 ]);
克隆数组
1 2 3 4 5 let colors = [ "red" , "green" , "blue" ];let [ ...clonedColors ] = colors;console .log (clonedColors);
参数解构 1 2 3 4 5 6 7 8 9 10 function setCookie (name, value, { secure = false , path = "/" , domain = "example.com" , expires = new Date (Date .now() + 360000000 ) } = {}
此代码中参数解构给每个属性都提供了默认值 ,所以你可以避免检查指定属性是否已被传入(以便在未传入时使用正确的值)。而整个解构的参数同样有一个默认值,即一个空对象 ,令该参数成为可选参数。
Set 与 Map Set 判断值是否重复 Set 和 Map 不会使用强制类型转换来判断值是否重复,而是使用 Object.is() 方法(唯一例外时 +0 与 -0 被判断为相等)
forEach() forEach() 方法会被传递一个回调函数,该回调接受三个参数:
Set 中下个位置的值;
Set 中下个位置的键;
目标 Set 自身。
因为 Set 中 每一项同时认定为键与值,因此 1 和 2 是相同的
1 2 3 4 5 6 7 8 9 10 let set = new Set ([1 , 2 ]);forEach (function (value, key, ownerSet ) {console .log (key + " " + value);console .log (ownerSet === set);1 1 true 2 2 true
如果想在回调函数中使用 this ,你可以给 forEach() 传入一个 this 值作为第二个参数
1 2 3 4 5 6 7 8 9 10 11 12 let set = new Set ([1 , 2 ]);let processor = {output (value ) {console .log (value);process (dataSet ) {forEach (function (value ) {this .output (value);this );process (set);
Weak Set 只允许存储对象弱引用,不能存储基本类型。add(基本类型)会报错,has()或delete()会返回 false
Weak Set 不可迭代,不能用于 for-of 循环,没有 keys() 与 values() 方法,没有 forEach(),没有 size 属性
Map Map 的初始化 你能将数组传递给 Map 构造器,以便使用数据来初始化一个 Map 。该数组中的每一项也必须是数组 ,内部数组的首个项会作为键,第二项则为对应值。因此整个Map 就被这些双项数组所填充。
1 2 3 4 5 6 let map = new Map ([["name" , "Nicholas" ], ["age" , 25 ]]);console .log (map.has ("name" )); console .log (map.get ("name" )); console .log (map.has ("age" )); console .log (map.get ("age" )); console .log (map.size );
Weak Map 所有键都必须是对象,都是弱引用,不会干扰垃圾回收。
没有 size 属性,没有 clear() 方法
实际应用:在对象实例中存储私有数据
在 ES6 中对象的所有属性都是公开的,因此若想让数据对于对象自身可访问、而在其他条件下不可访问,那么你就需要使用一些创造力。
1 2 3 4 5 6 7 function Person (name ) {this ._name = name;Person .prototype getName = function (return this ._name ;
1 2 3 4 5 6 7 8 9 10 11 12 13 let Person = (function (let privateData = new WeakMap ();function Person (name ) {set (this , { name : name });Person .prototype getName = function (return privateData.get (this ).name ;return Person ;
当 Person 构造器被调用时,将 this 作为键在 Weak Map 上建立了一个入口,而包含私有信息的对象成为了对应的值,其中只存放了 name 属性。通过将 this 传递给 privateData.get() 方法,以获取值对象并访问其 name 属性, getName() 函数便能提取私有信息。这种技术让私有信息能够保持私有状态,并且当与之关联的对象实例被销毁时,私有信息也会被同时销毁。
迭代器与生成器 意义:
for 循环需要初始化变量以便追踪集合内的位置,而迭代器则以编程方式返回集合中的下一个项。
作用:
新增的 for-of 与它协同工作,扩展运算符( … )也使用了它,而它甚至还能让异步操作更易完成。
迭代器 何为迭代器 迭代器是被设计专用于迭代的对象,带有特定接口。所有的迭代器对象都拥有 next() 方法,会返回一个结果对象。该结果对象有两个属性:对应下一个值的 value ,以及一个布尔类型的 done ,其值为 true 时表示没有更多值可供使用。迭代器持有一个指向集合位置的内部指针,每当调用了 next() 方法,迭代器就会返回相应的下一个值。
若你在最后一个值返回后再调用 next() ,所返回的 done 属性值会是 true ,并且 value 属性值会是迭代器自身的返回值( return value ,即使用 return 语句明确返回的值)。该“返回值”不是原数据集的一部分,却会成为相关数据的最后一个片段,或在迭代器未提供返回值的时候使用 undefined 。迭代器自身的返回值类似于函数的返回值,是向调用者返回信息的最后手段。
生成器 何为生成器 生成器( generator )是能返回一个迭代器的函数。生成器函数由放在 function 关键字之后的一个星号( * )来表示,并能使用新的 yield 关键字。
1 2 3 4 5 6 7 8 9 10 11 function *createIterator (yield 1 ;yield 2 ;yield 3 ;let iterator = createIterator ();console .log (iterator.next ().value ); console .log (iterator.next ().value ); console .log (iterator.next ().value );
yield 关键字也是 ES6 新增的,指定了迭代器在被 next() 方法调用时应当按顺序返回的值,传递给 next() 的参数会成为 yield 语句的值。
生成器函数最有意思的方面可能就是它们会在每个 yield 语句后停止执行,在函数中停止执行的能力是极其强大的。
yield 关键字只能用在生成器内部,用于其他位置都时语法错误
1 2 3 4 5 6 function *createIterator (items ) {forEach (function (item ) {yield item + 1 ;
生成器函数表达式 1 2 3 4 5 6 7 let createIterator = function *(items) {for (let i = 0 ; i < items.length ; i++) {yield items[i];let iterator = createIterator ([1 , 2 , 3 ]);
不能将箭头函数创建为生成器
生成器对象方法 1 2 3 4 5 6 7 8 9 var o = {createIterator (items ) {for (let i = 0 ; i < items.length ; i++) {yield items[i];let iterator = o.createIterator ([1 , 2 , 3 ]);
可迭代对象与 for-of 循环 可迭代对象时包含 Symbol.iterator 属性的对象。
ES6 中,所有的集合对象(数组、Set与Map)以及字符串都是可迭代对象。
生成器创建的所有迭代器都是可迭代对象,因为生成器默认就会为 Symbol.iterator 属性赋值。
可迭代对象被设计用于与 ES 新增的 for-of 循环配合使用。
for-of 循环会调用当前对象的 Symbol.Iterator 方法(发生在后台),获取一个迭代器 iterator,然后在调用 iterator 的 next
在不可迭代对象、 null 或 undefined 上使用 for-of 语句,会抛出错误。
访问默认迭代器 可以使用 Symbol.iterator 来访问对象上的默认迭代器
1 2 let values = [1 , 2 , 3 ];let iterator = values[Symbol .iterator ]();
既然 Symbol.iterator 指定了默认迭代器,你就可以使用它来检测一个对象是否能进行迭代
1 2 3 4 5 6 7 8 9 function isIterable (object ) {return typeof object[Symbol .iterator ] === "function" ;console .log (isIterable ([1 , 2 , 3 ])); console .log (isIterable ("Hello" )); console .log (isIterable (new Map ())); console .log (isIterable (new Set ())); console .log (isIterable (new WeakMap ())); console .log (isIterable (new WeakSet ()));
for-of 循环在执行之前会做类似的检查,因此在遇到不可迭代对象是才会抛出错误
Weak Set 与 Weak Map 并未拥有内置的迭代器,使用弱引用意味着无法获知这些集合内部到底有多少个值,同时意味着没有方法可以迭代这些值。
创建可迭代对象 开发者自定义对象默认情况下不是可迭代对象,但你可以创建一个包含生成器的 Symbol.iterator 属性,让它们成为可迭代对象。
1 2 3 4 5 6 7 8 9 10 11 12 13 14 15 16 17 18 19 20 let collection = {items : [],Symbol .iterator ]() {for (let item of this .items ) {yield item;items .push (1 );items .push (2 );items .push (3 );for (let x of collection) {console .log (x);
当使用 let-of 迭代 collection 时,会调用内部的 Symbol.iterator,从而迭代 this.items。
只有当内置的迭代器无法满足你的需要时,才有必要创建自定义迭代器,这最常发生在定义你自己的对象或类时
内置的迭代器 集合的迭代器 ES6 的三种集合对象:数组、Map、Set,都拥有如下迭代器
entries() :返回一个包含键值对的迭代器;
集合的默认迭代器
当 for-of 循环没有显式指定迭代器时,每种集合类型都有一个默认的迭代器供循环使用。
values() 方法是数组与 Set 的默认迭代器,而 entries() 方法则是 Map 的默认迭代器。
1 2 3 4 5 6 7 8 9 10 11 12 13 14 15 16 17 18 19 20 21 let colors = [ "red" , "green" , "blue" ];let tracking = new Set ([1234 , 5678 , 9012 ]);let data = new Map ();set ("title" , "Understanding ES6" );set ("format" , "print" );for (let value of colors) {console .log (value);for (let num of tracking) {console .log (num);for (let entry of data) {console .log (entry);
字符串的迭代器 方括号表示法工作在码元而非字符上 ,因此它不能被用于正确访问双字节的字符
1 2 3 4 5 6 7 8 9 10 11 12 13 var message = "A B" ;for (let i=0 ; i < message.length ; i++) {console .log (message[i]);
ES6 旨在为 Unicode 提供完全支持,字符串的默认迭代器就是解决字符串迭代问题的一种尝试。这样一来,借助字符串默认迭代器就能处理字符而不是码元。
1 2 3 4 5 6 7 8 9 10 11 12 var message = "A B" ;for (let c of message) {console .log (c);
NodeList 的迭代器 随着默认迭代器被附加到 ES6 , DOM 关于 NodeList 的规定也包含了一个默认迭代器(此规定在 HTML 规范而非 ES6 规范中),其表现方式与数组的默认迭代器一致。
扩展运算符与非数组的可迭代对象 扩展运算符能作用于所有可迭代对象,并且会使用默认迭代器来判断需要使用哪些值。所有的值都从迭代器中被读取出来并插入数组,遵循迭代器返回值的顺序。
扩展运算符是将可迭代对象转换为数组的最简单方法。你可以将字符串转换为包含字符(而非码元)的数组,也能将浏览器中的 NodeList 对象转换为节点数组。
迭代器高级功能 传递参数给迭代器 1 2 3 4 5 6 7 8 9 10 11 12 13 function *createIterator (let first = yield 1 ;let second = yield first + 2 ; yield second + 3 ; let iterator = createIterator ();console .log (iterator.next ()); console .log (iterator.next (4 )); console .log (iterator.next (5 )); console .log (iterator.next ());
在迭代器中抛出错误 能传递给迭代器的不仅是数据,还可以是错误条件。
1 2 3 4 5 6 7 8 9 function *createIterator (let first = yield 1 ;let second = yield first + 2 ; yield second + 3 ; let iterator = createIterator ();console .log (iterator.next ()); console .log (iterator.next (4 )); console .log (iterator.throw (new Error ("Boom" )));
可以在内部使用 try…catch 捕获错误
1 2 3 4 5 6 7 8 9 10 11 12 13 14 15 16 17 18 function *createIterator (let first = yield 1 ;let second;try {yield first + 2 ; catch (ex) {6 ; yield second + 3 ;let iterator = createIterator ();console .log (iterator.next ()); console .log (iterator.next (4 )); console .log (iterator.throw (new Error ("Boom" ))); console .log (iterator.next ());
将 next() 与 throw() 都当作迭代器的指令,会有助于思考。
next() 方法指示迭代器继续执行(可能会带着给定的值),而 throw() 方法则指示迭代器通过抛出一个错误继续执行。在调用点之后会发生什么,根据生成器内部的代码来决定。
生成器的 return 语句 return 会终止后续的程序
1 2 3 4 5 6 7 8 9 function *createIterator (yield 1 ;return ;yield 2 ;yield 3 ;let iterator = createIterator ();console .log (iterator.next ()); console .log (iterator.next ());
return 可以指定返回值
1 2 3 4 5 6 7 8 function *createIterator (yield 1 ;return 42 ;let iterator = createIterator ();console .log (iterator.next ()); console .log (iterator.next ()); console .log (iterator.next ());
扩展运算符与 for-of 循环会忽略 return 语句所指定的任意值。 一旦它们看到 done的值为 true ,它们就会停止操作而不会读取对应的 value 值。不过,在生成器进行委托时,迭代器的返回值会非常有用。
生成器委托 一些情况下,将两个迭代器的值合并在一起会更有用
1 2 3 4 5 6 7 8 9 10 11 12 13 14 15 16 17 18 19 20 function *createNumberIterator (yield 1 ;yield 2 ;function *createColorIterator (yield "red" ;yield "green" ;function *createCombinedIterator (yield *createNumberIterator ();yield *createColorIterator ();yield true ;var iterator = createCombinedIterator ();console .log (iterator.next ()); console .log (iterator.next ()); console .log (iterator.next ()); console .log (iterator.next ()); console .log (iterator.next ()); console .log (iterator.next ());
异步任务运行 由于生成器能让你在执行过程中有效地暂停代码操作,它就开启了与异步编程相关的许多可能性。
由于 yield 能停止运行,并在重新开始运行前等待 next() 方法被调用,你就可以在没有回调函数的情况下实现异步调用。
传统异步操作
调用一个包含回调的函数
1 2 3 4 5 6 7 8 9 let fs = require ("fs" );readFile ("config.json" , function (err, contents ) {if (err) {throw err;doSomethingWith (contents);console .log ("Done" );
使用 yield
1 2 3 4 5 6 7 8 9 10 11 12 13 14 15 16 17 18 19 20 21 22 23 24 25 26 27 28 function run (taskDef ) {let task = taskDef ();let result = task.next ();function step (if (!result.done ) {if (typeof result.value === "function" ) {value (function (err, data ) {if (err) {throw (err);return ;next (data);step ();else {next (result.value );step ();step ();
1 2 3 4 5 run (function *() {let contents = yield readFile ("config.json" );doSomethingWith (contents);console .log ("Done" );
此例执行了异步的 readFile() 操作,而在主要代码中并未暴露出任何回调函数 。除了 yield 之外,此代码看起来与同步代码并无二致 。既然执行异步操作的函数都遵循了同一接口,你就可以用貌似同步的代码来书写处理逻辑。
看上去好像更复杂了,但这是因为当前回调任务少,如果需要嵌套回调函数,或者需要按顺序处理一系列的异步任务时,使用生成器和迭代器会方便很多 。
JS 的类 ES5 中的仿类结构 自定义类型
1 2 3 4 5 6 7 8 9 10 11 12 13 function PersonType (name ) {this .name = name;PersonType .prototype sayName = function (console .log (this .name );let person = new PersonType ("Nicholas" );sayName (); console .log (person instanceof PersonType ); console .log (person instanceof Object );
类声明 1 2 3 4 5 6 7 8 9 10 11 12 13 14 15 16 17 18 19 class PersonClass {constructor (name ) {this .name = name;sayName (console .log (this .name );let person = new PersonClass ("Nicholas" );sayName (); console .log (person instanceof PersonClass ); console .log (person instanceof Object ); console .log (typeof PersonClass ); console .log (typeof PersonClass .prototype sayName );
自有属性:该属性出现在实例上而不是原型上,只能在类的构造器或方法内部进行创建。
类与自定义类型的区别
类声明不会被提升,这与函数定义不同 。类声明的行为与 let 相似,因此在程序的执行到达声明处之前,类会存在于暂时性死区内。类声明中的所有代码会自动运行在严格模式下 ,并且也无法退出严格模式。类的所有方法都是不可枚举的 ,这是对于自定义类型的显著变化,后者必须用Object.defineProperty() 才能将方法改变为不可枚举。类的所有方法内部都没有 [[Construct]] ,因此使用 new 来调用它们会抛出错误。调用类构造器时不使用 new ,会抛出错误。试图在类的方法内部重写类名 ,会抛出错误。
如果我们不使用类来定义上面的 PersonClass
1 2 3 4 5 6 7 8 9 10 11 12 13 14 15 16 17 18 19 20 21 22 23 24 25 26 27 28 29 30 31 32 let PersonType2 = (function ("use strict" ;const PersonType2 = function (name ) {if (typeof new .target === "undefined" ) {throw new Error ("Constructor must be called with new." );this .name = name;Object .defineProperty (PersonType2 .prototype "sayName" , {value : function (if (typeof new .target !== "undefined" ) {throw new Error ("Method cannot be called with new." );console .log (this .name );enumerable : false ,writable : true ,configurable : true return PersonType2 ;
类表达式 类与函数有相似之处,即它们都有两种形式:声明与表达式。
1 2 3 4 5 6 7 8 9 10 11 12 13 14 15 16 17 18 19 20 21 let PersonClass = class PersonClass2 { constructor (name ) {this .name = name;sayName (console .log (this .name );let person = new PersonClass ("Nicholas" );sayName (); console .log (person instanceof PersonClass ); console .log (person instanceof Object ); console .log (typeof PersonClass ); console .log (typeof PersonClass .prototype sayName ); console .log (typeof PersonClass2 );
作为一级公民的类 能被当作值来使用的就称为一级公民
JS的函数就是一级公民,类也延续了下来。
类能作为参数传入函数;也有立即调用类构造器的用法。
访问器属性
